
We all love a pretty garden. If you’re blessed with the opportunity to convert a small space in your home into a garden for whatever plants you want – be it edibles or just fancy looking plants – make sure to add plants that also do your nose a great favor.
Sweet and pleasant smelling plants are undoubtedly the most popular choices of addition for people while improving their gardens. Jasmines, spearmints, eucalyptus, lemon balms – there are a lot of plants that you can choose from to get that perfect fragrance hit your nostrils every time you enter your pretty garden. One such plant is the Rajnigandha plant or Tuberose.
In this article by Elitech Drip, we’re going to take a look at how you can grow Rajnigandha plants in your gardens using Tuberose bulbs. Let’s get started.
Contents
Why you should Grow Rajnigandha?
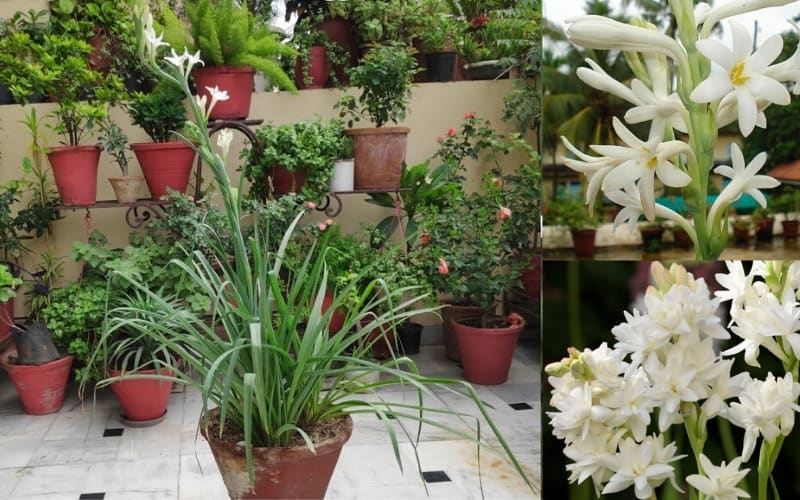
Scientifically, Rajnigandha belongs to the family Asparagaceae, and is called Polyanthes Tuberosa. Despite being native to Mexico, Rajnigandha plants can be easily grown in most parts of India, owing to the suitable climate and growth conditions.
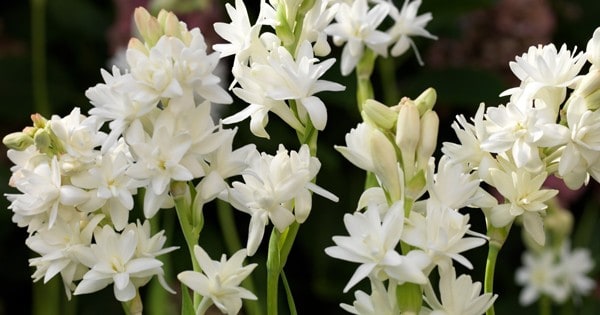
Tuberose or Rajnigandha flowers can be used in a lot of weddings as garlands and bouquets, and are even extracted for essential oils. These oils are very popular in the fragrance industry. Their fragrance is one of the main reasons their spikes are great choices for your gardens.
Tip: It’s important to know that Rajnigandha can be grown in different kinds – there are single petal flowers, double petal flowers, and multi petal flowers. Rajnigandha is also a night blooming plant.
How To Grow Rajnigandha at Your Home
Rajnigandha flowers are really easy to grow and with enough care and nourishment, can form fully blooming fragrant flowers in about two months. They can be grown either in pots or be buried directly into the ground. Let’s take a look at each of these methods one by one.
Watch the video above to learn how to Grow Rajnigandha from the bulb
Growing Rajnigandha in Pots
When using pots, it is recommended that you choose pots that are at least 8 inches tall. This helps the rajnigandha bulbs immerse themselves well enough into the soil. Also, in each pot, you can have up to two bulbs. Each bulb can grow to give two to three spikes of sweet smelling flowers.
Let’s talk about soil now. While you can simply use gardening soil in an unaudited manner, growing rajnigandha using proper soil mix will greatly improve its growth. We recommend splitting the soil mix into three important parts, taking 1 part garden soil, 1 part cocopeat, and 1 part of vermicompost. Mix these three components thoroughly inside the pots before immersing the bulbs.
Important Tip: There is also an alternative for the soil mix, if you are running short of cocopeat. Form the soil mix of four parts – one part filled with vermicompost and the other three with garden soil.
Once done, take a single rajnigandha or tuberose bulb and press it into the garden soil with its pointed end facing upwards. Make sure the bulb is at least one inch deep into the soil mix. Now place the second bulb a little far away from the first bulb. Repeat the same process for the second bulb.
After the bulbs have been perfectly put in place, water the pot generously the first time. From the second time onwards, water only when you find that the soil has lost its moisture and has become dry. You don’t want to make the soil too soggy with water, as this can cause the bulbs to rot.
Growing Rajnigandha On The Ground
Now if you want your Rajnigandha plants to grow on the ground instead of on a pot, the process is rather easy, and kind of similar to what you would do to plant the bulbs in pots.
Spot a suitable place for growing these plants, and then bury a hole. Before you plant the bulb inside, mix the soil with vermicompost and bone meal in equal parts.
We know that vermicompost is an excellent organic fertilizer, but what about bone meal? Bone meal is great and is important to the plant because it provides important calcium, phosphorus and protein. Also, rajnigandha bulbs love calcium.
Immerse the bulb one inch deep into the soil with its pointed end facing up, and bury it completely. Repeat the same process for the other bulbs. Since you’re planting them on the ground, there is no need to stick with just two bulbs. Try to keep a distance of one feet between each bulb for the roots to grow freely, and fit as many bulbs as you can into the garden space you’ve allotted for these plants.
How Long Does It Take For Rajnigandha To Grow?
While the question sort of depends on your climate and soil conditions, typically in Indian climates, Rajnigandha flowers take around two and a half months to grow into fully-fledged night-blooming plants with the sweetest fragrance. However, the first sign of flowering will be seen after four months of sowing bulb.
The plant ideally grows at temperatures around 20 to 35 degree Celsius, so try planting them in March when the temperatures are warm and optimal. Rajnigandha plants also continue flowering until mid-October and November, so you may want to keep these dates in mind while planting them.
Once you plant the bulbs, you would normally have to wait for about 15 days until you can observe the first sprouts. After this, the growth is rather quick, and within three weeks, you would be able to notice stems or spikes starting to shoot up. It takes almost a whole month for the spikes to grow to a feet tall.
From this stage onwards, you will be able to watch significant changes in the shoots as they develop two or three petalled flowers depending on what you had planted. During the final month of the growth process, the flower will start giving off scents and your garden will be filled with a sweet fragrance that can almost brighten up anyone’s mood.
When should I Sow Rajnigandha Bulbs?
Rajnigandha bulbs are quite easy to grow from sowing bulbs. It’s best to sow these bulbs just as the spring season starts in the month of March. Good growth requires good amount of sunlight and around 4 months of warm weather.
How to grow Rajnigandha at Home?
Rajnigandha Plant is generally grown from sowing root bulb.
How long it takes Rajnigandha Plant to start blooming flowers?
After sowing Rajnigandha bulb, It takes around 4-5 months for it to start producing flowers.